Traveling Quilt Block #1

Round robin block for Kay

At the March meeting of the Cincinnati Modern Quilt Guild, those of us participating in the Traveling Quilt/ Round Robin fun exchanged blocks. One lucky person got my shark block (well, maybe not so lucky–someone at break told me that she thought it looked pretty intimidating to add to), and I received a block from someone else.

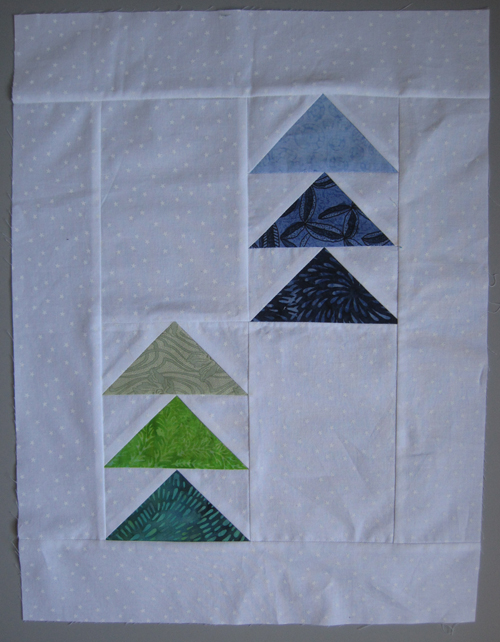
Kay round robin block

This is the block I received from Kay. She asked that all the blocks have a white background and that they include green and blue flying geese. The blocks could be any size, and she didn’t care whether they were joined to her block or not. Easy enough!

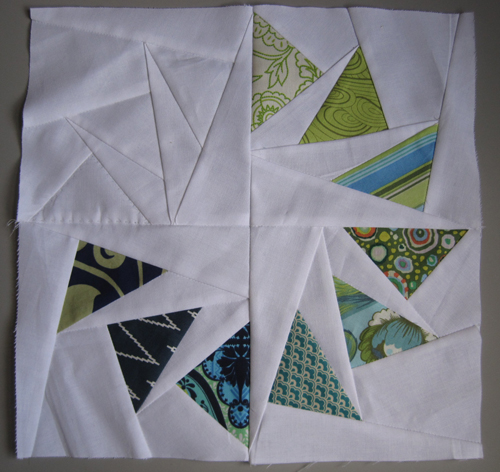
It didn’t take me long to decide to make my go-to block: Circle of Geese. Yes, I’ve made it a bunch of times. But it works for so many occasions. And I’m getting pretty good at making it!

Round Robin block aborted

My first idea was to use printed fabrics for nine of the twelve geese and then outline the remaining three with embroidery floss in blue and green. You can see where I did the embroidery on one goose and took it out. The embroidery didn’t have as much weight as I had hoped, and the block just wasn’t working for me.

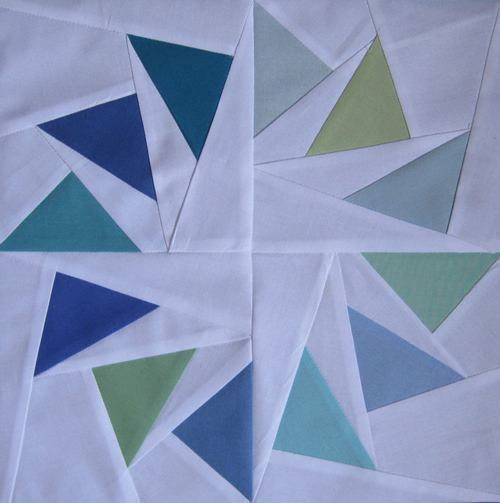
Then I decided to play around with some of the solid fabrics in the Robert Kaufman jelly roll I got for Christmas. I pulled out all the blues and greens and organized them from lightest to darkest. Just for fun, I alternated blue and green for each goose, moving from light to dark for each.

Round robin block Kay no borders

I liked this much better, but I kind of didn’t like how the tones ended up very divided, with the lights only on the right and the darks on the left. So I added a border strips of the lightest blue and the darkest green to balance it out a bit.

Round robin block for Kay

This block is a bit smaller than Kay’s block, so I won’t attach it. And that way she can keep the borders or not or do whatever she likes with the block.

I’m glad that came together quickly, so I don’t need to worry about it. But now I won’t get the next block to play with until the May meeting—rats!

Boy’s Column Quilt Complete

Boy Column Quilt topAs I mentioned in my previous post on bearding, my Boy’s Column Quilt is complete! Except for the bearding part, I’m super happy with it.

I wrote a bit about the quilt top in a previous post. For the backing of the quilt, I had ordered a gray print from an online store that sells their fabric in half-yard increments. I knew this, but I still ordered only half of what I needed for the back.

Boy Column Quilt back

But that gave me the opportunity to do some creative piecing with two of the blues from the front of the quilt. It still wasn’t quite long enough, so I added a section of Joel Dewberry Botanique fabric that I picked up at Sewn Studio.

My niece Emma happened to be with me as I was trying to figure out how to piece the backing. Once I had it almost done, I explained to her why I decided to cut the gray/blue section and insert the new fabric there, rather than just tack it onto the top or the bottom. Emma listened patiently to my explanation of my design decisions, and then said, “Yeah, but I really don’t think a teenage boy is going to care.” True enough, wise Emma, true enough.

Boy Column Quilt back detail

I quilted it on my home machine using my new Sew Steady table. Even though I just quilted straight lines, the Sew Steady did help a lot in keeping the quilt easy to maneuver.

As far as the bearding goes, I did wash the quilt, dried it, and then picked off all the little pieces of batting that came up through the fabric. Next, I soaked some Snuggle drier sheets in a spray bottle of water and sprayed both the front and back of the quilt and let it dry. Even that process was enough for a few more bits of batting to poke through.

I shared the quilt and the bearding saga with the ladies at the Cincinnati Modern Quilt Guild, and the general consensus is that something was up with the batting. But they encouraged me to donate the quilt anyway. Someone actually said, “A teenage boy isn’t going to care.” And I do think the bearding will calm down now that the environment is less dry.

So I’ve made my label and will sew it on and get this quilt off to Project Linus and its new owner!

Boy Column Quilt label

Shark Block for Traveling Quilt

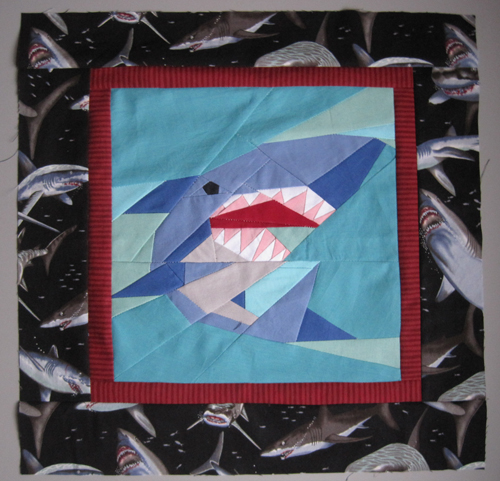
Shark blockTonight at the Cincinnati Modern Quilt Guild meeting, I’ll be embarking on a great journey with five of my fellow members. It will be a Traveling Quilt journey. Each of us will bring a quilt block of any size or shape to the meeting, and throughout the year the rest of us will take turns adding to that block. Each of us will provide a few guidelines for what we’d to have added (or what we wouldn’t like added), but other than that, the fate of our quilt will be left in the hands of our team members. Pretty exciting, huh?

For some reason, I decided to torture my team members with my block. Because I made a shark block. Andie Johnson brought this paper pieced pattern on Craftsy to my attention several months ago because is reminded her of the shark skirt I had made for my niece. I had kept the pattern bookmarked because I knew I’d want to buy it at some point. And that point came with my Traveling Quilt.

As I’ve mentioned before, I like to try to make my charity quilts for older boys, just because I’ve heard several charities mention that they don’t always have a lot of donations for that demographic. But I find them to be challenging. So why not ask my team members to help?

Making the pattern was actually easier than I thought, but it was time consuming.

Shark pattern detail

The pattern consists of twelve small paper-pieced segments (far right above) that are then pieced together according to the chart (center) to get the finished block. Whew!

Shark block detail

Some of the pieces are tiny! And even though I left the paper on to piece the twelve segments together, there were just way to many pieces for me to get perfect.

I still have some paper to remove from the back, but in the interest of time, I added my borders, and he’ll soon be on his way!

Shark block

I’m not expecting it to be a shark quilt, just a quilt that a boy may like. I’ll ask my team members to use blue, teal, gray and red as the main colors; accent colors will be white and black. But I will include some of my leftover shark fabric, just in case anyone wants to use it.

Good luck on your journey, Paper-Pieced Sharky! I can’t wait to see how you turn out!

A Problem of Bearding

It’s been a frustrating few weeks in quiltland for me. I was so excited to start on the quilting for my latest boy’s charity quilt. But as soon as I started quilting, the quilt started to beard.

What is bearding? It’s when the fibers of a quilt’s batting migrate through the fabric and are visible on the top and back of your quilt.

bearding

The causes of bearding that I’ve always heard are things that I thought I had avoided.

Polyester batting: The stiffer fibers of polyester are more likely to make their way through the fabric fibers. But I had purchased cotton batting for this quilt, and cotton is thought to rarely cause bearding.

Low-quality fabrics: Fabrics with a looser weave are more susceptible to bearding because the batting can easily make its way to the top of the quilt. That’s part of why I always purchase my fabrics at quilt stores, where high-quality 100% cotton fabric is available.

Too-thick needles: Another possible cause of bearding is a sewing machine needle that is too thick and creates holes that the batting fibers can travel through. This one really got to me because I actually bought quilting needles for this quilt. I usually just use a universal needle to quilt, but I had recently read that a quilting needle is sharper and makes easier work of the quilting.

So what the heck?

I then came upon this article at Quilters Dream. In it, the writer states that the real cause of bearding is static. Static is something I have a lot of.

The writer of the article says that even high-quality cotton batting can beard if there’s enough static. And the dyeing process darker fabrics go through make them more likely to promote static. Plus it’s been a wild winter and the heat has been running non-stop in the house. So basically, the perfect storm for bearding.

Many sources will tell you there’s no way to stop bearding; you just need to let it run its course and eventually it will stop. But this writer contends you just need to stop the static. She suggests spraying the quilt with Static Guard, but I’d hate to do that to a quilt I’m giving away to charity. Her other solution is to place anti-static dryer sheets in a spray bottle with water and spray the quilt, then let it dry.

I’m going to give it a try, and I really hope it will work. I love this quilt and hope that the bearding abates enough that it can find a new home. More shots of the finished quilt in my next post.

Boy Column Quilt on couch